Creamy and Passionate Mango Pie
Overview
If you only have low-gluten flour, butter, and eggs, and you still want to make a surprising snack~ you might as well try this. It’s simple, easy, and zero-failure. The key is that it tastes great! The creamy flavor is rich, the mango is soft and glutinous, and the pie crust is crispy and fragrant. Why is it a square pie? Aren’t they generally round? This~ Because I don’t have a special round pie plate with a loose bottom, I think it’s good to use the square plate that comes with the oven. It’s practical. You don’t have to buy a lot of special tools for baking. You can use common tools in life. Baking is fun, don’t make it a burden~
Tags
Ingredients
Steps
-
Make the pie crust first, soften the butter at room temperature, and poke holes with chopsticks.

-
The rock sugar is beaten into powdered sugar through a juicer. I think the powdered rock sugar is better than the powdered sugar bought directly from outside. Firstly, it is clean. Secondly, the sweetness is moderate. Even if you add too much, it will not hurt your throat.

-
Add a little salt to the low-gluten flour, mix well and set aside.

-
Beat butter until slightly white and puffy

-
Pour rock sugar into the whipped butter and continue to beat with a whisk evenly.

-
Whip until puffy and whiter, and no powdered sugar can be seen in the bowl.

-
One whole egg, about 50 grams, beaten well.

-
Only use 35 grams of egg liquid to make the pie crust. Pour the egg liquid into the butter in two batches and continue to stir evenly until the egg liquid is absorbed. (The remaining 15 grams of egg wash will be used for brushing the pie crust at the end)

-
Then sift in the flour

-
Gently knead the flour and butter with your hands until they form small particles. Then knead it into a non-sticky dough. It will be very crumbly at first, which is normal, but it will be fine after kneading it for a few times.

-
After kneading the dough into a ball, put the dough into a plastic bag and refrigerate it for 2 hours to allow the dough to blend better with the oil.

-
One mango, peeled.

-
Cut off the mango pulp along the core, and then cut the pulp into slices. Spare

-
Take out the refrigerated dough. It will be very hard at first. Leave it at room temperature for 5 minutes to soften naturally. Then roll the dough into a large piece, about 4-5 mm thick. The area must be larger than the baking pan.

-
First grease a baking sheet with butter to prevent it from sticking, then place the dough sheet on the baking sheet, use a rolling pin to roll it along the edge of the baking sheet and remove the edges.

-
Use a fork to prick small holes in the baking sheet to prevent them from bulging while baking.

-
Place the mango slices one after another, spreading them in two opposite directions to fill the gaps and arrange them evenly. There is no need to fry the fillings, the mango itself has a very good taste and is moderately soft and hard.

-
Next, make the crust for the mango pie. Roll out the remaining dough into a rectangular sheet, which can be a little longer, and cut it into strips about 1 cm wide with a knife.

-
First, lay the noodles diagonally in one direction and every 1 centimeter on the mango

-
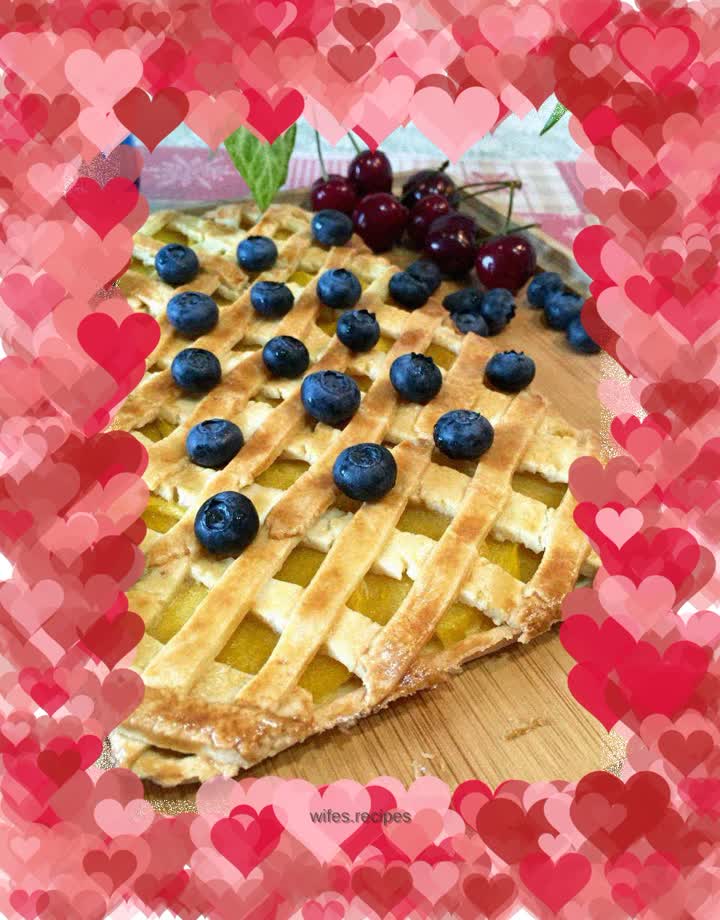
Then change the direction and lay out the noodles at intervals so that the noodles overlap and overlap, and remove the excess edges. I didn't braid the flower basket pie crust because I thought it would be too troublesome. It's easy and convenient to overlap it this way, and it's also very beautiful.

-
Dip a brush into the remaining egg wash and brush it onto the pie crust, coating each piece. Preheat the oven for 5 minutes, turn the heat up and down, place the baking sheet on the lower shelf for 25 minutes, and then move it to the upper shelf for 4 minutes to help color.

-
Take out the mango pie and decorate it with blueberries, cherries, or your favorite fruit~picture of the finished product

-
The roasted mango is particularly fragrant and soft, and the taste is amazing! And the mango is very sweet after roasting, so I didn’t put sugar in the mango. Picture of the finished product

-
Finished product picture.
