Colorful Chocolate Fruit Cake
Overview
I made a cake for my friend’s princess on her birthday. She loves fruit, so she filled it with fruit. Making cakes is really like life sometimes, there is no rehearsal, every moment is live broadcast, because you don’t know what the next step will be before you do it, and every step of the operation cannot be changed. This cake is just like this, so some steps can be interchanged in order, and they are only given for your reference.
Tags
Ingredients
Steps
-
Beat the light cream and fine granulated sugar with ice water and an electric whisk until the cream is clearly textured and not flowing. Lift the whisk head and it will have a firm corner

-
Place the cake base on the decorating turntable, line it with parchment paper around it, place an 8-inch chiffon cake slice, smooth it with butter, and then place diced fruit in the middle. The area should be slightly larger than the 6-inch chiffon cake. (The fruit must be drained of surface water before cutting) (Those who have seen the finished product will know that in fact, this step can be directly covered with fruits. At first, I planned to place whole strawberries around, so I spread the fruits in the middle. Later, the whole strawberries were not enough and the sizes were different, so I added diced fruits)

-
Then spread a layer of cream on top of the fruit. (This layer is what I call a bit of a naked cake)

-
Place the 6-inch chiffon on top and arrange it

-
Continue smoothing the surface and sides. (I won’t go into details about wiping the dough here. If you don’t know how, you can refer to the techniques in the cream cakes I posted a few times before. Besides, my wiping technique is not perfect)

-
Add a little pink coloring to the remaining cream and beat it well with a whisk

-
Use a 6-tooth nozzle to put into a piping bag, put the pink cream into the piping bag, and use a circular motion to squeeze out a circle of flowers

-
Add pearl sugar to the interface

-
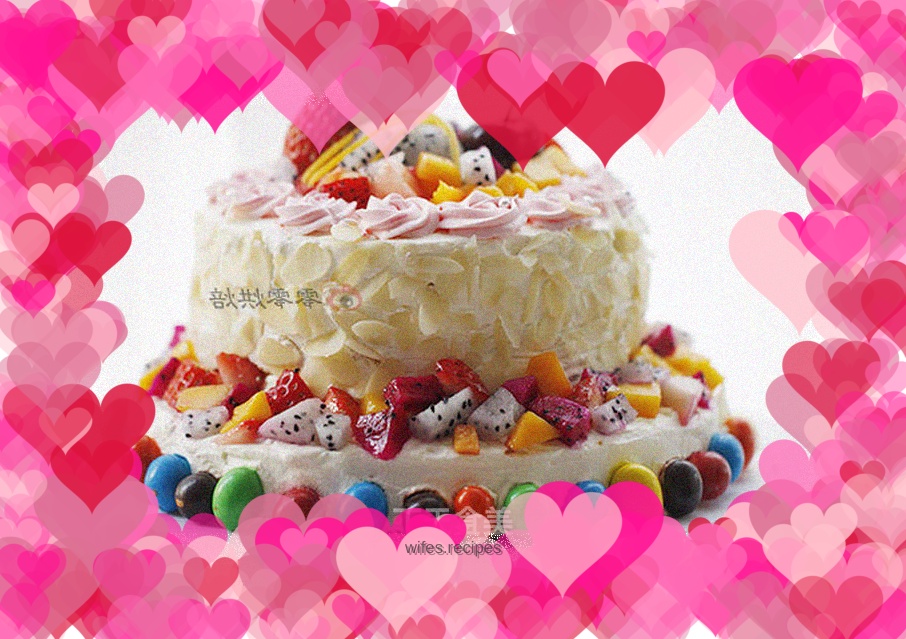
Make a circle with colored chocolate beans on the bottom layer, and stick almond slices on the side of the 6-inch chiffon. You can use tweezers dipped in a little cream and stick the almond slices on it. (It is best to choose smaller chocolate beans. This one is too big and heavy, and it will be a bit difficult to hang in the end)

-
Then put fruits around and on top of the bottom layer
