Painted cake roll
Overview
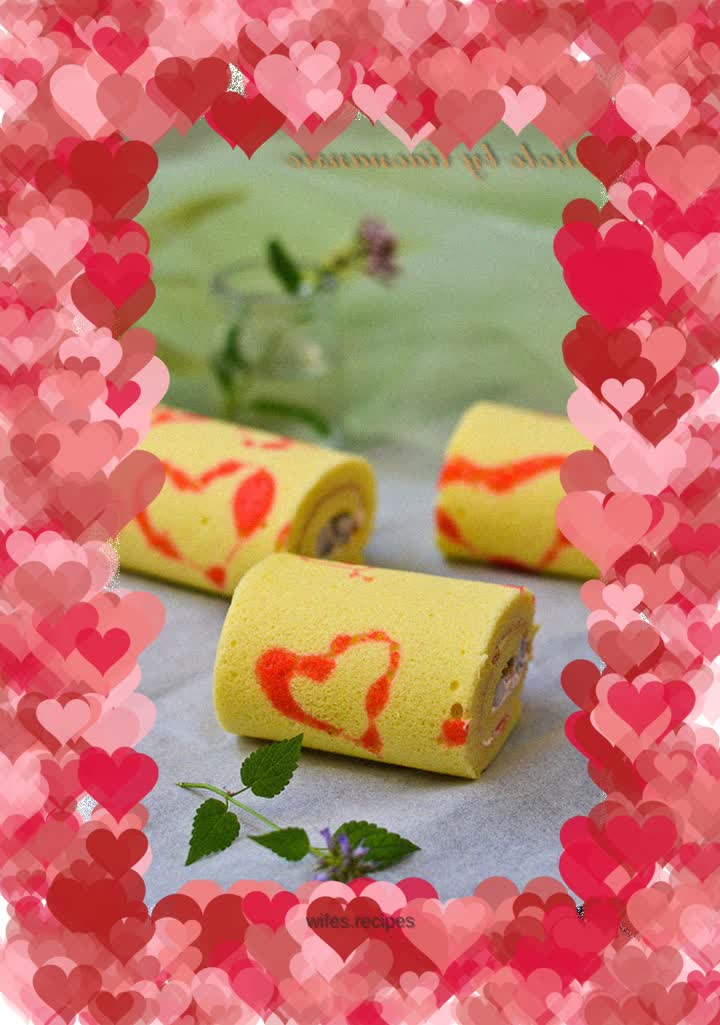
Beauty is actually very casual [Painted Cake Roll] During the National Day holiday, a friend wanted to take her daughter with me to experience the fun of baking. As for Mimi, she hasn’t done it in some days, so she needs to practice it first. It can’t be like that time when my friend learned how to roll cakes from me, but I made a mistake with the recipe and the cake rolls didn’t roll up. In the past, when doing color painting, I always beat the paste and then took out some coloring. Later, I found that the mixed paste should not be left for a long time, and the beaten paste is relatively stable. This time, I changed the method and the effect was quite good. As for painting, Mima is definitely an idiot in this aspect. Well, for the sake of beauty, it’s okay for us to boldly try it.
Tags
Ingredients
Steps
-
Materials needed for the cake body.

-
In order to ensure that the amount of liquid is accurate, I put the milk and oil in the bowl for beating the egg yolk batter at once, add about 25 grams of sugar, and mix thoroughly.

-
Beat the egg yolks and protein separately into two containers. Here you need to use a manual egg beater to mix the egg yolk, oil and milk evenly. It's not very convenient to use a scraper.

-
Like this.

-
Squeeze a few drops of lemon juice into the egg whites. Its function is to promote the beating of the egg whites and maintain the stability of the egg whites. It can also prevent the cake from having an eggy smell. Add the remaining sugar in three batches.

-
Beat the egg whites to 8 and distribute. After turning off the egg beater, lift the egg beater to pull out the triangle.

-
Sift the base powder into the egg yolk paste, and mix it for a few times with the egg beater turned off,

-
Then start the whisk and beat on low speed until smooth. If you have any problems, you can remove the whisk head and stir a few more times.

-
Both pastes are ready. When not mixed, they can be kept for a period of time and we can use them to make the painted part of the picture.

-
Take a small bowl and take small portions of the egg yolk paste and egg white paste.

-
Mix evenly using the cutting and mixing method.

-
To add red pigment, you can also use red yeast powder. Mix well.

-
Put it into a piping bag, cut a small opening,

-
Extrude flower shape. Let me explain here, the paste must be fine enough, otherwise it will be blocked when squeezing flowers and the squeezing will be uneven. This is what happened to me. Well, just make the mistake and make a big picture.

-
Preheat the oven to 180 degrees in advance, place a baking sheet, and shape the flowers. If it is not a non-stick baking sheet, you need to line it with parchment paper.

-
At this time, we can mix the egg white and egg yolk paste. The old method is to take a part of the egg white paste and put it in the egg yolk paste.

-
Mix evenly by cutting and mixing method. Pay attention to the technique, and you must not draw circles.

-
Pour this mixed batter into the egg white batter and mix until even.

-
The mixed paste is smooth and delicate.

-
Take out the baking sheet and the flowers are formed.

-
Pour the cake batter evenly into the baking pan.

-
Put in the oven at 180 degrees for 20 minutes.

-
When the cake is ready, you can prepare the fillings. The cake will still have to cool after it is baked, so there is no need to rush into whipping the cream. Refrigerate the whipped cream in advance to help whip it up.

-
Add light cream to powdered sugar and beat.

-
After the cake is baked, cover it with parchment paper, turn it upside down and let it cool. It can be easily removed from the mold.

-
Add another piece of parchment paper, turn the cake over, spread the cream and top with the sliced dragon fruit. Roll up

-
Twist the two ends, fix the shape, and cut into pieces.
