White Christmas
Overview
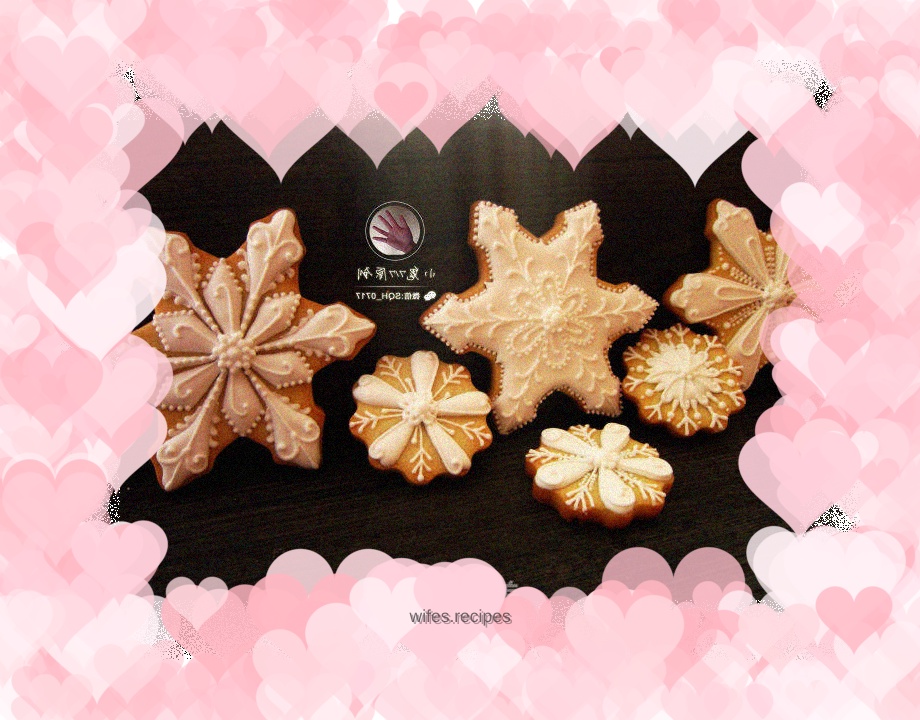
I am addicted to making Christmas cookies recently. Hehe, I don’t know why I look forward to Christmas the most in the year. When the streets and alleys are filled with Christmas decorations, I feel that winter is really coming, so I make some cookies to look forward to Christmas
Tags
Ingredients
Steps
-
Biscuit recipe: Butter 100g powdered sugar 50g egg liquid 20g low flour 150g Preparation method: soften the butter at room temperature and add powdered sugar to beat, then add the egg liquid and stir evenly, finally stir in the flour and stir until there is no dry powder. The finished biscuit dough needs to be Put it in the refrigerator for about an hour, take it out and roll it out to a thickness of about 0.5cm. Use a mold to cut out the pattern. Place the engraved pattern on the baking sheet. Leave a gap between each biscuit to prevent adhesion. Bake at 180 degrees for about 12 minutes until the surface is slightly yellow.

-
Frosting method: 230g of powdered sugar, a few drops of lemon juice, 7.5g of protein powder, 32g of warm water. Mix the sugar and protein powder evenly, add warm water and stir evenly, then add a few drops of lemon juice and whip the frosting into a creamy consistency. The whipped frosting should be stored in a sealed box. Take an appropriate amount of white to make a soft frosting. Just add water to dilute it. Water Add it drop by drop until the frosting drips from a high place. Lay it flat for about ten seconds, indicating that this state can be used for paving. Take a spoonful and put it directly into a piping bag for piping lines. Don’t forget to insert the Wilton No. 1 nozzle. After preparing the frosting, you can draw on the biscuits. You can make a rough draft with an edible pencil before drawing.

-
Use an edible pencil to draw patterns on the surface of the cookies

-
Use soft icing to paint the surface of the cookies

-
Use icing sugar to outline the surface

-
The final picture of the finished product, the process is a bit complicated, but it is very beautiful, it looks good and tastes delicious
