car birthday cake
Overview
How to cook car birthday cake at home
Tags
Ingredients
Steps
-
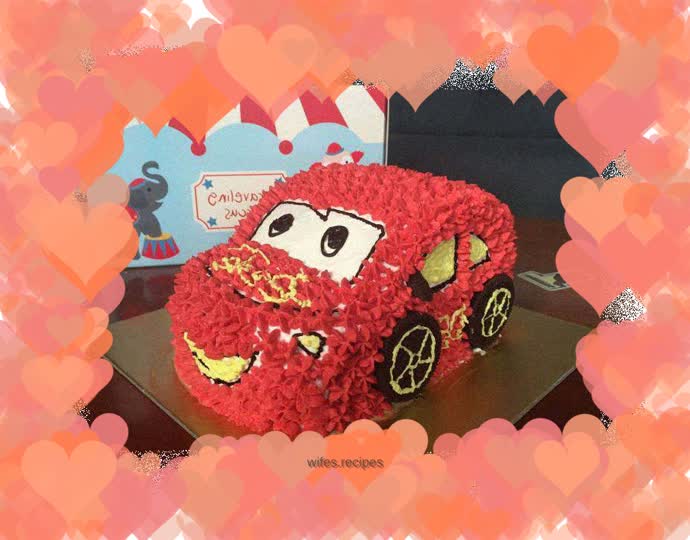
Bake the 8-inch round chiffon cake and set aside (for the chiffon cake recipe, you can refer to the recipe I posted before). After the cake is cool, cut off a semicircle on each side to make the roof (roughly determine the size first), and then trim it slightly after placing it.

-
Whip the light cream with white sugar (whip until ready for piping, be careful not to over-beat), cut the main part of the car into two pieces, spread the whipped cream in the middle, and put diced fruits (strawberries, mangoes, canned peaches, etc., you can also put some pudding or soaked raisins).

-
Spread the cream and fruit and cover the car body with another cake slice.

-
Spread butter on the main part of the car and place two small semicircles on top to serve as the upper part of the car. Spread butter in the middle of the two semicircles to stick them together better.

-
Apply cream all over (the front and side windows of the car should be smoothed, it’s okay if other places are not smoothed, the inside will not be visible after decorating).

-
Melt the dark chocolate over water and put it into a piping bag. Cut a small slit in the front of the piping bag, draw the outline of the car windows on the cake, and stick four pieces of Oreo cookies on the bottom edges of both sides to serve as wheels.

-
Take a small portion of the whipped cream, add food coloring to turn it yellow and set aside, and turn the rest of the cream red. Follow the outline and decorate it with red cream. Pipe yellow cream on the side windows and words.

-
Look at the back~

-
Completed.
