Snowskin mooncake
Overview
The annual Mid-Autumn Festival is here, and traditional mooncakes can no longer attract the public's attention. Colorful snowskin mooncakes have become a hot-selling favorite. They do not need to be baked, have a soft, smooth texture, and are slightly elastic. They are deeply loved by young people and children! Today I will teach you how to make snowskin mooncakes. Even people without any baking knowledge can learn it easily! If you want to know more about the food production process, you can follow the WeChat public account "Ning You Taste", where new recipes will be released every week!
Tags
Ingredients
Steps
-
I bought the snowskin mooncake powder online. It is very simple to use and is much more convenient than the traditional method of mixing, adding oil and steaming.

-
The natural fruit and vegetable powder or matcha powder from Uji, Japan, is much safer than adding coloring.

-
The bean paste filling prepared is from Lian Xiang Lou. For novices, it is more convenient and easier to store ready-made fillings.

-
Pour the snowskin mooncake powder into the stainless steel pot.

-
In order to make the color look better and to obtain a different taste, I also added matcha powder. You can also add cocoa powder or other natural fruit powder and vegetable powder.

-
Add 40 grams of boiling water and stir quickly with chopsticks while pouring the water.

-
Knead into a uniformly colored dough and set aside.

-
Divide into several small balls according to the ratio of 25g crust and 25g filling. This recipe can make 8 50g snowskin mooncakes.

-
I prepared various colors of dough.

-
Prepare some ice skin powder as loose powder.

-
Dip your hands into some hand flour, take a round ball and press it into a round piece, then take a ball of filling and place it on the round piece.

-
Turn the outer skin toward the inside and slowly wrap the filling. Be careful not to let the filling leak out when wrapping. You can also dip some hand powder in the wrapping process to make wrapping easier. When closing the mouth, pinch it tightly.

-
Round again.

-
Dip some hand powder on the ball and gently put it into the mold and press it. The jelly mold I used here, you can also directly use a press-type mooncake mold, which is easier to operate.

-
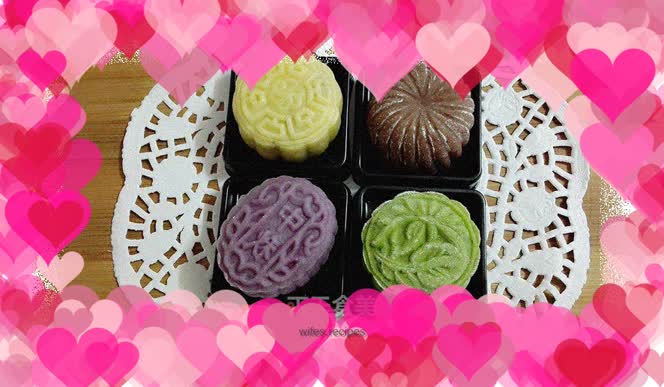
Turn the mold upside down, tap it gently on the table, and a finished mooncake will come out.

-
After the snowskin mooncakes are made, if you want to give them away, you can buy a special mooncake packaging box and put them in the refrigerator for a few hours to taste better. If you need to store it for a longer time, you can also put it in the freezer and defrost it naturally when you eat it! But remember that snowskin mooncakes should not be stored for too long, preferably within three to five days! ! !
