hellokitty fondant cake
Overview
Every girl has a pink hellokitty dream... I am no exception... This fondant is super cute. It is really suitable for any little girl or big girl... Come and play with Kewei... Every detail is taken care of, and you can do it too... More than 40 steps are explained in detail...
Tags
Ingredients
Steps
-
First we need to prepare a six-inch butter pound cake. I have it in my recipe. You can check it out....

-
Prepare dry Pez, fondant paste, anti-stick white oil, and a series of molds...

-
Apply anti-stick white oil to your hands. Take a piece of fondant paste and knead it softly on the mat....

-
Use a rolling pin to roll it into even thin slices... Pay attention to the size of the cake. Don't roll it into a small package...

-
Use a brush to apply some adhesive on the butter cake,

-
Use a rolling pin to hold up the fondant...

-
Cover the cake...

-
Use a smoothing tool to smooth the surface of the cake. Make the fondant paste and cake adhere closely...

-
Then use your hands to smooth out the fondant paste on the sides of the cake, while continuing to smooth it out with a smoother...

-
Completely wrap the cake....be very flat....

-
Use a knife to cut off the excess fondant paste....

-
OK. The main body of the cake is wrapped...

-
Take a little fondant paste...add purple coloring...knead evenly...

-
Roll out into long strips...

-
We use a soft ruler to measure the circumference of the bottom of the cake. . . . .

-
Then cut a strip slightly longer than the circumference. . . . . Cut off the excess. . . .

-
Seal the cake around the edges. . . .

-
Then we'll cut a long strip. . . . .

-
Make it into a bow. . . Place it at the interface of the perimeter. . . .

-
Use the mold pictured. . . .

-
Press your heart. . . Attach it to the bow as shown in the picture. . .

-
Pressed out little stars. As shown in the picture. Post it. . . .

-
Next we are going to make hellokitty's body. . . . Apply anti-stick white oil to your hands. Take an appropriate amount of dry silk. As shown in the picture. . Make hellokitty's head. . . .

-
Get some more dry paisley. Drop in pink coloring and knead evenly. . Make a hellokitty body. Please check the picture below first. . . It has the appearance of a body and a head. .

-
Roll out the kneaded dry pancetta into thin slices. . . . .

-
Made into a hellokitty cape. . .

-
Take a piece of dry white silk and roll it into a long strip. . .

-
Put a border around the little cloak. . . .

-
Use a clean toothpick. . . . Pick out the furry feel on the edge of the cloak. . .

-
How about it. . This small detail makes the little cloak look so realistic. . . . .

-
Then we can transfer hellokitty to the cake body and make a pair of small hands and feet for her. .

-
Make a small bow out of pink dried pez. . . In fact, the smaller these things are, the more difficult they are to make. . . .

-
Glue the small bow on hellokitty's head. . .

-
Take a little dry silk and mix it into black, just a little bit is enough. . . Cut into thin strips. . .

-
Stick it on hellokitty's mustache. . . .

-
Use the snowflake fondant embossing mold. . . Press out the pattern. .

-
And stick to the surface of the cake. . As shown in the picture. . .

-
Get some silver decorative beads. . .

-
Use a fondant tool to make a small round dimple in the center of the flower. . Apply a little adhesive and place the silver beads in the center of the flower. . .

-
Okay. hellokitty is lonely, let's be a little kitten to keep her company. . . . .

-
Make a small bow for the kitty too. . . .

-
Use an embossing tool. Press out any letters you want. . . It can also be omitted. . . Glue to the sides of the cake. . . .

-
Use the rose embossing die. Make a small flower by pressing out the flower shape. . . . Place next to hellokitty. . .

-
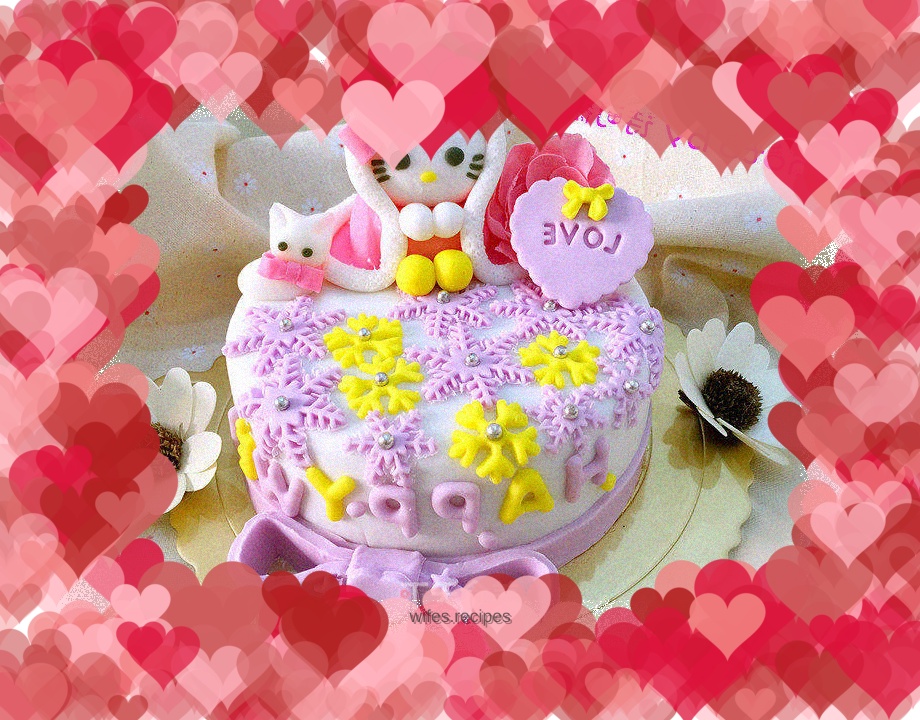
The finished product picture... is so cute...

-
Pictures of the finished product... Forgive me, I really love it so much... I can't help but take a few more...

-
Pictures of the finished product... Forgive me, I really love it so much... I can't help but take a few more...

-
Pictures of the finished product... Forgive me, I really love it so much... I can't help but take a few more...

-
Pictures of the finished product... Forgive me, I really love it so much... I can't help but take a few more...

-
Pictures of the finished product... Forgive me, I really love it so much... I can't help but take a few more...

-
Pictures of the finished product... Forgive me, I really love it so much... I can't help but take a few more...

-
Pictures of the finished product... Forgive me, I really love it so much... I can't help but take a few more...

-
Pictures of the finished product... Forgive me, I really love it so much... I can't help but take a few more...

-
Pictures of the finished product... Forgive me, I really love it so much... I can't help but take a few more...

-
Pictures of the finished product... Forgive me, I really love it so much... I can't help but take a few more...

-
Pictures of the finished product... Forgive me, I really love it so much... I can't help but take a few more...
