Crispy roasted pork
Overview
First of all, I want to apologize to all netizens and friends. I promised to update at least once a week. Due to the tight schedule at the end of the year, there was no vacancy last week. Especially those of you who learned from the preview that I was going to make this dish, I really kept you waiting for a long time. Without further ado, let’s get started. Traditional Cantonese barbecue and roast pig are recognized as the highest level. Its special status and meaning also make the second brother frequently appear in major sacrificial activities. Returning to the food itself, roasted pig is divided into suckling pig/medium pig/large pig according to its size. The size of the pig is basically determined according to the number of participants. The method is mainly divided into two schools: light skin and sand skin. Jiaozuo vaguely remembers eating the smooth-skinned suckling pig several times at family weddings when he was very young. It looked bright, complete, and flawless, and the skin tasted like a piece of potato chips with a very fragrant pig flavor. It is said that due to the cumbersome craftsmanship, the number of masters who can roast suckling pigs with bare skin is gradually disappearing. The method of making sand skin is what this article mainly introduces. Its principle is to make the surface of the pig breathable through needle pricking. During the roasting process, bubbles are formed on the surface of the pig skin, and then it is repeatedly polished to form a fat but not greasy feeling that melts in the mouth. At the same time, it can be stored at room temperature for a period of time and still remain very crispy. Another tip for cooking: If you eat roasted pork outside, remember to ask the chef if the pig head is still there. Because the best part of a whole roast pig is the cheeks! (I won’t tell anyone else)
Tags
Ingredients
Steps
-
The pork belly required for making roast pork must first have a certain width. Note: The one in the picture is an iPad Mini

-
The second thing is to choose as fat as possible while still having a sense of hierarchy!

-
Here I would like to introduce this special tool, which is also a tool that Cantonese barbecue chefs often use when dealing with the second brother - the nail loquat. It can also be regarded as "repaying the other with the same method." I hope friends who know what this tool is specifically called can tell me.

-
There is indeed a professional term for this action, called "pine needle". The purpose of using this tool this time is to poke countless small holes at the bottom of the pork belly to facilitate the flavoring. If you don't have this tool, you can use a fork instead.

-
The seasoning for pickling is mainly dry powder: salt, pepper and five-spice powder, plus an appropriate amount of minced garlic,

-
Mix

-
Spread evenly over the bottom of the meat. Wrap in plastic wrap and place in the refrigerator, preferably overnight.

-
Boil a pot of water, skin side down, and cook for 12 minutes.

-
Use chopsticks to stir the seasoning into the water.

-
Then flip and cook for another 8 minutes.

-
After taking the meat out, use clean water to rinse off the seasonings adhering to the surface of the meat, especially the skin. Make sure there are no seasoning residues. (The original text of the public account here has an animated GIF) After drying the oil and moisture on the surface with kitchen paper, take out the second brother's rake again and perform acupuncture on the front and sides of the pork belly in the style of Grandma Rong. During this period, any oil that leaks out needs to be absorbed with kitchen paper. Note: This step must be done thoroughly, as it plays an important role in the success of roasting pork. Its purpose is to allow the oil to drain through the needle holes during the roasting process, thereby maintaining the integrity of the roasted pork skin.

-
Apply a little soy sauce to the surface of the skin to color it. Then prepare a baking sheet, lay it with tin foil (bright side facing up), put the grill on the grill, place the pork belly skin side up, and let it dry until the surface of the skin is dry. At this time we can preheat the oven to 200C/400F.

-
Bake at 200C/400F for 90-120 minutes (depending on the thickness of the meat). At the same time, prepare a large bowl. Pay close attention to the oil release of the meat in the oven. When it is about 1/3 full, you need to take it out and pour the pork into the bowl. This can be justifiably called "burning lard"! It is a first-class ingredient for bibimbap, stir-fries, and making puff pastry!

-
After the time is up, you can turn on the broil mode of the oven and bake the surface of the skin over medium heat until it becomes golden and bubbly. If this is the roasted pork that has been taken out (already reduced by nearly half), it is already crispy! But! If you want to achieve the "skin-melting" taste, please continue reading below.

-
Continue to place the pork belly in the oven. When a layer of black charcoal has just formed on the surface of the pork skin, take it out immediately.

-
Let it cool slightly (that is, you can barely touch it with your fingers without feeling too hot), and then use the blade of a knife to slowly polish off the layer of black charcoal formed.

-
Then put it back into the oven. This action needs to be repeated at least once. Some patient chefs require it to be repeated three times, so that the final saved pig skin is only about 1/3 of the original pig skin, so as to achieve the feeling of melting in the mouth.

-
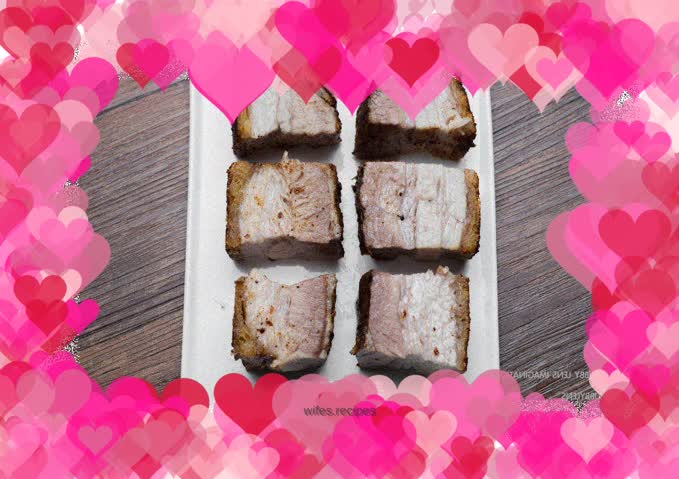
Admire the finished product.

-
Admire the finished product.

-
Welcome to scan the QR code!
