car
Overview
If you are born in the 80s or 90s, as long as you grew up in China, you must have spent some time with it. If you are born in the 60s or 70s, even if you have never played with it, you must have bought it for your children. It is these small cars that carry our beautiful memories of childhood. I don’t know how many of my friends have become car fans from the small cars they started with. Every girl has a princess dream in her heart, and the dream in a boy’s heart is a car dream...
Tags
Ingredients
Steps
-
Separate egg whites (remember there must be no water or oil in the egg beating pan!)

-
Add fine sugar to the egg yolks and mix well

-
Add corn oil and mix well

-
Add pure milk and mix well

-
Sift in the low-gluten flour and stir in a Z-shape until the flour is evenly mixed. Remember not to stir in circles...

-
Add the fine sugar to the egg whites in 3 batches and beat

-
Whisk until double small peaks appear, that is, dry state

-
Add 1/3 of the egg whites to the egg yolk batter and stir evenly, using the stirring and cutting techniques

-
Finally, pour all the egg yolk paste into the remaining 2/3 of the egg whites and mix evenly

-
Pour the batter into the mold, scrape the batter to make it even, and shake it lightly 2 or 3 times

-
Preheat the oven to 150 degrees for 10 minutes in advance, place the mold on the bottom shelf of the oven, and bake at 150 degrees for 55 minutes

-
Take out of the oven and shake lightly 2 or 3 times, invert for 2 hours and let cool

-
Use a round mold to cut off the small semi-arc shapes on both sides and cut away the excess on the surface, then cut the semi-arc shapes side by side at an angle to make the upper part of the car

-
Cut the car body into 3 pieces

-
For one piece, cut two small half arcs on both ends, then cut the middle rectangle into 2 parts, and then cut out the excess cake according to the position of the front of the car. The small squares on both sides in the picture are useless, there is excess...

-
Stack the remaining 2 car body cake pieces together, cut off the excess cake to make the "small waist" of the car

-
Whip 650g whipping cream and 65g caster sugar until it is thick enough for filling and spreading

-
One layer of cake slices, one layer of fruit cream filling

-
The second layer is for the upper body of the car, so just put half of the fruit

-
Assemble each small part of the car, apply a thin layer of whipped cream and stick it on each position (the two rectangles in step 16 are put together at the front and back of the car)

-
Simply wipe the surface of the car and keep it refrigerated for later use

-
Make ganache to draw car windows, eyes, headlights...etc.) Ganache is a mixture of dark chocolate and light cream 1:1 mixed with warm water

-
Add the remaining 250 whipping cream and 25g of fine sugar and beat until 6 or 7 minutes apart. Add blueberry fruit flavor powder and beat until full

-
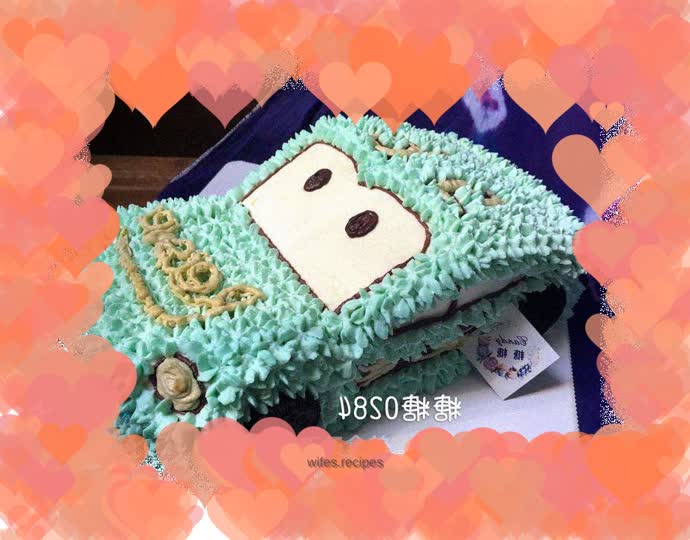
Use a 6-tooth decorating nozzle to decorate the car body...Due to the hot weather, the creaming is quite intense. I originally used a small 6-tooth nozzle to decorate the car body. Today I used a medium-sized 2D6-tooth nozzle, and the effect is also very good...

-
There is a little bit of whipping cream left, add orange fruity powder to adjust the color

-
Fill in the numbers and write English words

-
Attach Oreo cookies to the four sides to act as wheels

-
The car is finished! The finished product is beautiful!

-
Finished product!
