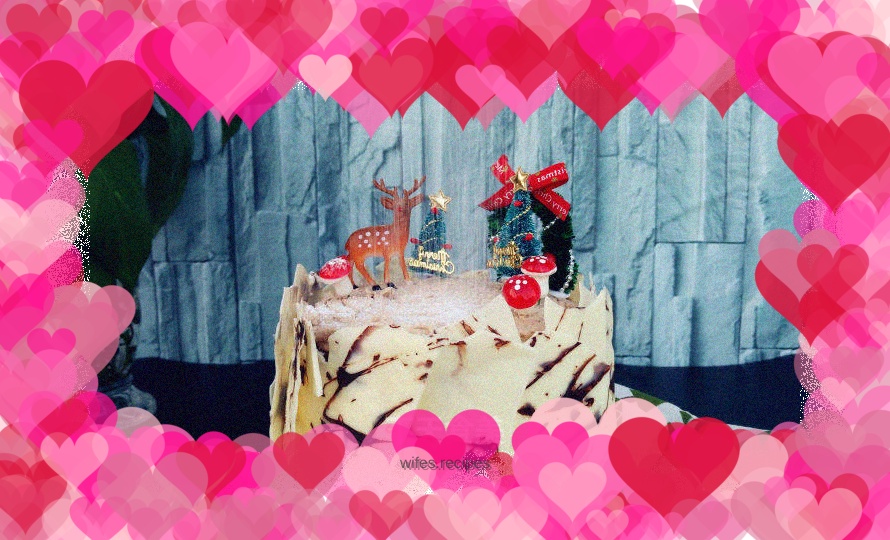
Chocolate tree stump cake with rich Christmas style
Overview
The atmosphere of Christmas is getting stronger and stronger, and it seems unreasonable not to produce a work with an appropriate theme. When I was browsing Instagram a few days ago, I saw a picture of this tree stump cake. I really liked it, but unfortunately I didn’t know how to make it. After much deliberation, I decided to come to the cottage. The cake base is a split-egg chocolate sponge cake, which effectively avoids defoaming and has a very authentic and super rich taste. I almost ate it when it came out of the oven. The outside is surrounded by chocolate, so you don’t have to worry about getting dirty when wiping it. Cover it up and you can’t see anything. All in all, this is a cake that is easy to make, delicious, and looks good. This Christmas, don’t you really want to give it a try?
Tags
Ingredients
Steps
-
Heat the butter, milk and dark chocolate over a pot of water, stirring until the chocolate melts.

-
Sift in the cocoa powder and mix evenly with a hand whisk.

-
Then keep the chocolate paste warm with warm water.

-
.Separate the egg yolk and protein, place the egg white in a water-free and oil-free egg beating basin, start the egg beater, add fine sugar in 3 times, and beat the egg white until dry peaks. (First, use a whisk to beat the egg whites at low speed until bubbles form, and add 1/3 of the powdered sugar. Then, continue to beat with an electric whisk at high speed until the egg whites double in volume, and then add 1/3 of the powdered sugar. Then, continue to beat with an electric whisk at medium speed until lines appear slightly, and add the remaining 1/3 of the powdered sugar. Finally, whisk at low speed until resistance is obvious, and the tip of the whisk is a short and small peak when you lift the whisk.)

-
Add the beaten egg whites to the egg yolks and mix them evenly using the first speed of the whisk.

-
Keep whipping until the cake batter appears and does not disappear. Lift the whisk and the batter can accumulate when it drips.

-
Mix low-gluten flour and cornstarch and sift into cake batter.

-
Use a hand mixer to mix evenly.

-
Add the chocolate paste made in step 3 and mix evenly with a manual whisk.

-
Stir the batter evenly, fine and smooth.

-
Divide batter evenly among 4 cake pans.

-
Put it into the preheated oven, set the upper and lower heat to 170°C, middle rack, and bake for 16 minutes.

-
Place the baked cake on a baking sheet to cool.

-
Next we make the chocolate surround. Melt the black and white chocolate over water.

-
Dip the dark chocolate solution with chopsticks, flick it on the oil paper casually, draw lines, and spread it out in some places, trying to be as casual as possible. After the dark chocolate is roughly set, pour the white chocolate over the dark chocolate and smooth it out with a spatula. After preventing the chocolate from flowing anymore, cover it with a piece of oil paper, and then put a baking sheet to press it down. This can prevent the chocolate from warping, and wait for the chocolate to solidify at room temperature.

-
While waiting for the chocolate to set, let's whip the whipped cream. Whip the whipped cream until lines just appear.

-
Take 1 piece of cake and place it on the bottom. Take an appropriate amount of whipping cream and put it on the cake piece, and use a spatula to smooth it out slightly. You don't need to spread it very evenly here, you can feel free to do it. Then cover the second cake piece, remembering to align it with the edge of the first cake piece when covering. Spread the dough with whipped cream again, and so on, until the fourth cake piece is finally covered. Do not spread cream on the fourth cake piece. Then start to spread the sides, with the spatula perpendicular to the cake body, the blade of the knife close to the sides, and turn the decorating table so that the sides will gradually become flat. (This cake does not need to be smoothed particularly flat, just smooth it roughly.)

-
Add appropriate amount of chocolate sauce to the remaining whipped cream and turn it into light brown.

-
Put it into a piping bag and pipe a growth ring shape on the top cake piece.

-
The chocolate should be solidified by this time. Break it into a rectangle that is roughly the same height as the cake. You don’t need to break it neatly

-
Arrange chocolate chips around the outside of the cake.

-
Just add the decoration at the end.
