Blueberry Cheese Sticks
Overview
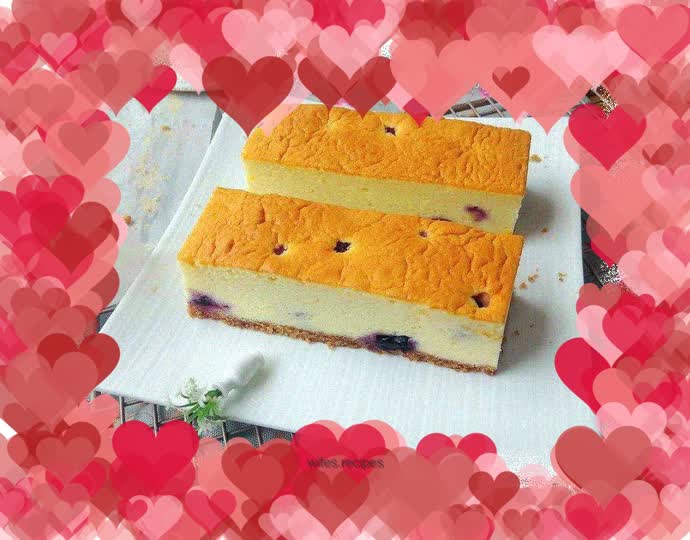
Finally, dozens of frozen blueberries were used to make this long-awaited cheesecake bar. I still stocked up on a few boxes a few months ago. I always like to throw some away when doing various baking. Nutritious and delicious blueberries not only taste sweet and sour, but also have very high nutritional value. They have the strongest antioxidant and ability to enhance memory. The anthocyanins in blueberries can promote the regeneration of rhodopsin in retinal cells, prevent severe myopia and retinal detachment, and improve vision. At the same time, it has the ability to accelerate the regeneration of visual purple, which is indispensable for good vision. So the last bit of blueberries really can’t be wasted. I used cheesecake to match it. The steaming and baking method will not destroy the nutrition of the blueberries. At the same time, the texture of the cake is richer and more beautiful because of the blueberries. When the cake was ready and placed in the refrigerator, my son secretly ran over to grab a piece and eat it. I hadn’t taken a photo yet, which made me feel sad. Fortunately, it was equally beautiful when cut into strips. I gave the broken strip directly to my son. He was so happy eating it that he said: “Mom, it’s so delicious, I want to eat it again!” Digestive biscuits are used as the base of the cake. The biscuits themselves are greasy, so I did not use butter when mixing them, but mixed them with homemade yogurt. In this way, it is very delicious, and the delicate and soft cheese melts in your mouth. The popped blueberries mixed in are the icing on the cake, so delicious!
Tags
Ingredients
Steps
-
Prepare the required materials

-
Crush digestive biscuits with a spatula + mix with 30G homemade thick yogurt

-
Press the mixed biscuits into the bottom of the cake mold. In order to make it easier to take out the cake, put oil paper on the mold and put it in the refrigerator

-
Heat cream cheese + butter in hot water until melted

-
Stir the softened cheese and butter until smooth and without lumps

-
Then add 100G homemade thick yogurt and mix well

-
Separate the yolks and whites from the eggs. Add the yolks one by one to the yogurt cheese and mix well

-
Add a total of four egg yolks and mix well

-
Sift the cake flour and cornstarch together and add

-
Use a spatula to stir from bottom to top until the cheese batter is free of particles and flowable, then store in the refrigerator

-
Add egg whites in 2 portions and beat with sugar until wet peaks

-
Take half of the protein bubbles and mix with the cheese batter

-
Then add the remaining egg white bubbles

-
Mix into a fine cheesecake batter

-
Take the cake mold out of the refrigerator, pour the cake batter on top of the biscuit crumbs, and finally garnish with blueberries

-
Put it into the oven at 150 degrees and bake in a water bath for 1 hour (fill the bottom two layers of the baking sheet with water, and place the cake mold directly on the baking sheet)

-
After baking, let the cake cool naturally

-
Chill in the refrigerator for a few hours and cut into strips.
