Decorated cake: Snow Rabbit
Overview
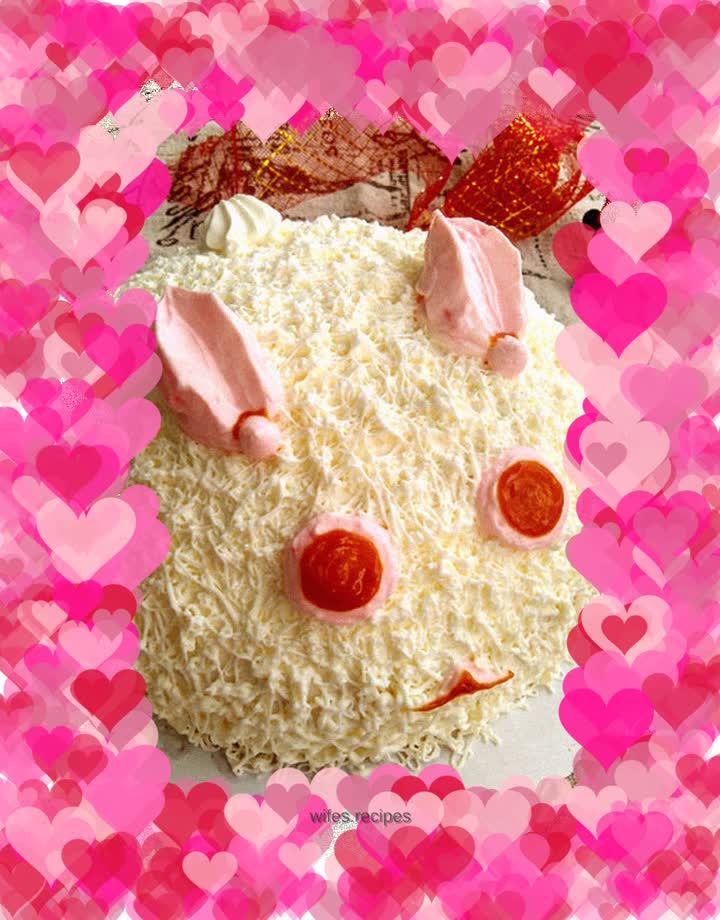
Receive instructions to make a decorated cake for the children. After a few seconds, an image of a monkey flashed in my mind. However, while the cake was still cooling, the monkey had already died in his imagination. There is no description, no picture, and just the word monkey, how can you be sure that this is an unpleasant thought? Stunned, speechless and helpless, his thoughts quickly turned to the rabbit. Monkeys may be a bit funny, but rabbits should always be associated with pink cuteness, right? Well, except for the rogue rabbit. The same material, but with a new layer of skin, and the unpleasant monkey has become a snow hare that doesn't matter whether he likes it or not. It should be said that the rabbit is much more trouble-free than the monkey. The thin-mouthed piping bag is simmered against the semi-circular hill, so that the small thin lines zigzag to cover the entire hill. Although it is very simple, it is still a bit tiring to spray the entire hill. It would be much easier if you have a spray bucket with happy ribbons. It doesn't matter if the smear is good or not, as long as it has a rounded arc, any other smear marks and exposure will eventually be covered up. After spraying the rabbit fur, find a point as the butt and add a short rabbit tail. Opposite the tail is naturally the rabbit face. Pull out the bunny ears on the upper part of the face. If you don't have special tools, just find any substitute and make grooves on the ears. It's almost enough. Don't make it worse than it can be. The easiest thing to do for eyes is small chocolate discs, which can be placed directly on the face. It doesn’t matter if you don’t have it. Just squeeze two rounds of pink cream in your hand and smooth the surface. Anyway, rabbits have always been given the characteristic of red eyes. I just dotted some cream on my mouth and pulled it on both sides, and it was done. It's pink on a white background and looks like a rabbit, but it's obviously a bit baffling. You still have to have an eyeball, and caramel cream sauce is the most readily available dark color. Carefully squeeze out round eyeballs on the pink eyeballs, and then trace the lips. The rabbit looks passable. Oh, that's it, it's done!
Tags
Ingredients
Steps
-
Ingredients: 1 8-inch chiffon cake, 400 grams of animal-based fresh cream, 40 grams of fine sugar, a little coloring, a little creamy caramel sauce

-
Cut the cake crosswise into three equal slices.

-
Cut off the edge of the top layer at a 45-degree angle.

-
Place the shaved cake on top and cut off the right-angled edge of the upper edge of the second layer of cake.

-
Round the arc and remove any cake crumbs.

-
Whip the fresh cream and sugar until it retains its texture.

-
Place the bottom cake slice on the turntable and spread the filling cream all over it.

-
Place the second layer of cake slices and spread butter on top.

-
Place the third layer of cake slices and smear the surface with cream.

-
Fill the top with the trimmed cake pieces to form a dome.

-
Put the cream on top and spread.

-
Finished wiping,

-
Place the buttercream into a piping bag with a narrow mouth and pipe coiled filaments onto the surface.

-
Fill the entire arc surface.

-
Use the pointed toothed mouth to extrude a shell shape on the upper side to serve as a tail.

-
Take out the pink cream and use a large round nozzle to squeeze out two fillets on the opposite side of the tail.

-
Then use any tool to make a groove in the front of the ear.

-
Just in front of the ear, squeeze out two small cones.

-
Use red cream to extrude two flat circles under the ears and where the eyes are.

-
At the midpoint below the eyes, add a little dot for the nose and mouth.

-
Outline the lips with the little red dots on both sides.

-
Finally, use creamy caramel sauce to squeeze out the eyeballs, outline the lips and the base of the ears, and you're done.
