Glutinous rice flour cake
Overview
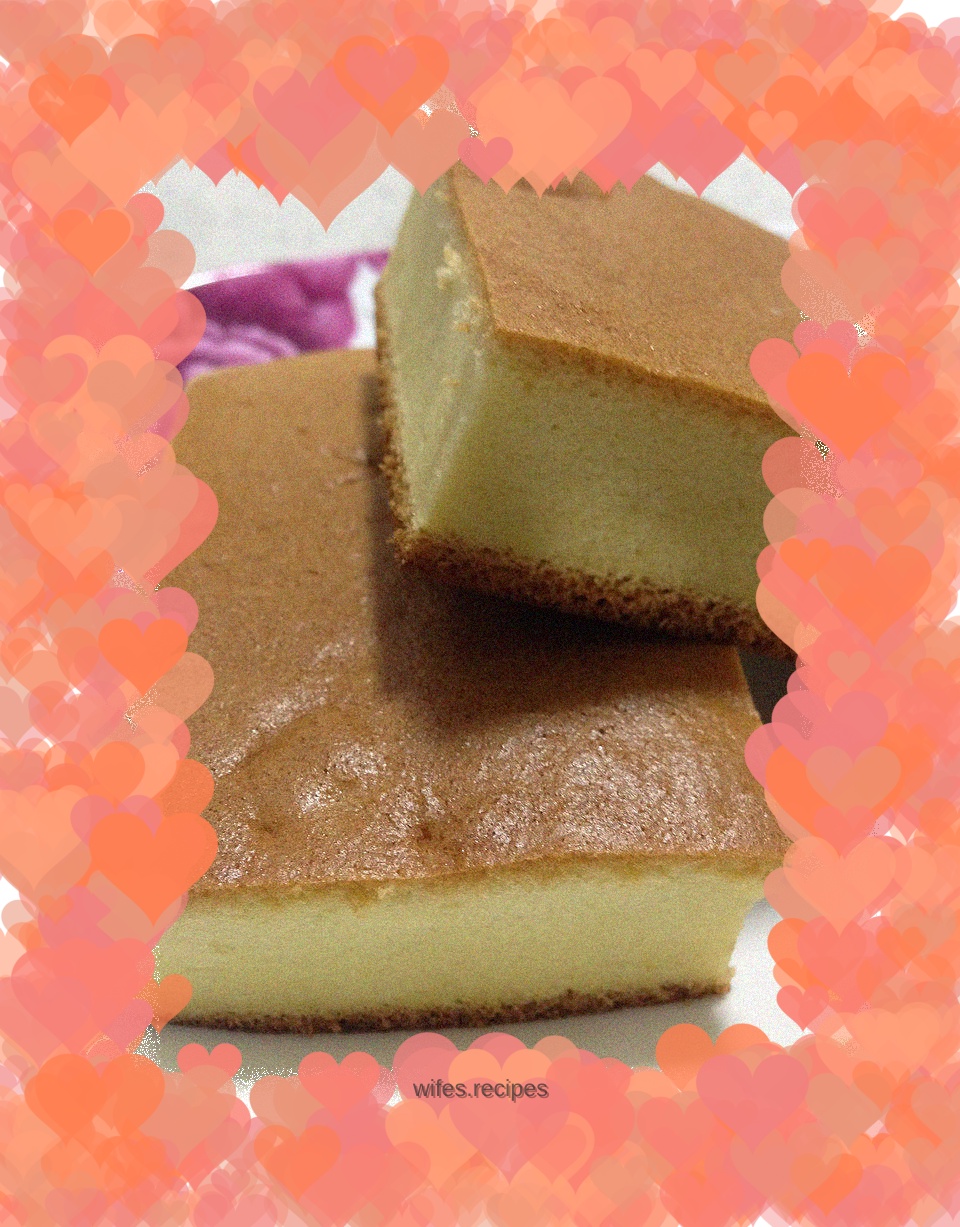
It turns out that low-gluten flour is not necessary to make cakes. A few days ago, I saw a recipe for making cakes using glutinous rice flour. I was very surprised. I tried it immediately. The finished product was amazing, softer than chiffon, and the elasticity was not ordinary. The cake is placed on the table. When I pass by it, I can't help but press it with my hand. As soon as I let go, it immediately springs back to its original shape. It is full of elasticity and is fragrant and glutinous when eaten in my mouth. Sure enough, as the prescription said, it has been well received by the broad masses of the people.
Tags
Ingredients
Steps
-
Great collection of materials. Sift the glutinous rice flour in advance and weigh all the ingredients.

-
Separate the egg yolk and white, put the white in the freezer of the refrigerator, and freeze until the edges start to freeze, about ten minutes.

-
Add olive oil, milk, and 10 grams of white sugar to the egg yolks. Beat with a hand mixer over warm water until thick.

-
Sift in the glutinous rice flour and stir until there is no dry powder. Glutinous rice flour is gluten-free, so you don’t have to worry about gluten.

-
The batter may look a little too thick, don't worry.

-
When the egg whites were taken out of the refrigerator, there were slight ice residue on the edges. Add a few drops of lemon juice or white vinegar. (At this time, you can preheat the oven to 160 degrees)

-
Add the white sugar in three times, the first time when making coarse foam, the second time when making fine foam, and the second time after making obvious lines.

-
Beat until you lift the whisk and thin sharp corners appear, which is the so-called hard foam. There is no need to beat this cake until it is hard, just make a small curved hook.

-
Add 1/3 of the egg whites to the egg yolk paste, cut and mix evenly. I recently learned a cutting and mixing technique: go down with the spatula from the one o'clock direction in the upper right corner, and draw straight down to the seven o'clock direction in the lower left corner. Turn your wrist up naturally, repeat this action, and mix evenly.

-
Add another 1/3 of the batter and mix evenly.

-
Pour the batter back into the remaining 1/3 of the egg whites so that it can be completely evenly mixed

-
The mixed batter is fine and shiny. Lift the spatula and the batter will flow down like silk. The lines won't disappear immediately.

-
Pour into the mold and tap a few times to release big bubbles.

-
Place the baking sheet into the second-to-last rack of the preheated oven and set it to 160 degrees for 50 minutes.

-
If the whole process is 160 degrees, there may be some small cracks on the surface of the cake. If you mind, you only need to lower the oven temperature to 140 degrees and extend the baking time by 20 minutes accordingly.

-
If the color is too dark during the process, you can cover it with tin foil, but you must do it quickly, otherwise the cake will shrink immediately, without mercy.

-
After coming out of the oven, gently knock the mold on the table a few times to release the heat inside, and then flip it upside down immediately. This can greatly reduce the possibility of shrinkage. Let cool completely before cutting into pieces and serving.
