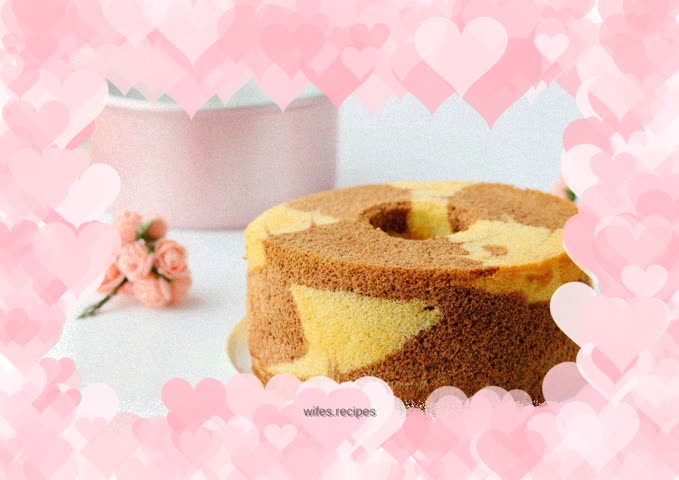
Two-color hot noodle chiffon cake
Overview
Chiffon cake is already a well-known cake. It has a soft and delicate texture. Everyone who has tried it likes it. Today I am making a hot noodle chiffon with a higher water content. The cake has a more delicate texture, like clouds and marshmallows, which is even more popular! I used Xuechu’s 7-inch hollow cake mold!
Tags
Ingredients
Steps
-
The ingredients are as shown in the picture. The eggs are medium-sized eggs weighing about 60 grams each. 48 grams of fine sugar is used to beat the egg whites. 16 grams of fine sugar is used for the egg yolk paste

-
Add 5 grams of cocoa powder to 10 grams of hot water and stir into a paste

-
Separate the egg yolk and protein into two containers. The container containing the egg white must be oil-free and water-free. Egg yolk cannot be mixed with the egg white

-
Pour milk, salad oil and 16 grams of caster sugar into the pot, heat over medium-low heat and stir until it reaches about 60 degrees, then turn off the heat

-
Pour the low-gluten flour into the milk pot and stir to combine

-
Stir until the flour and milk salad oil are completely mixed and gelatinized

-
Pour the egg yolks into the batter in 2 batches and mix well

-
Mix all the egg yolks into the batter. The batter is slightly thick and no oily milk and flour particles can be seen. This is a ready-made egg yolk batter

-
Beat the egg whites at high speed until there are abundant bubbles. Add fine sugar (48g) in three batches, turn to medium speed and finally beat at low speed

-
Whip until the meringue can stand up straight when you lift the whisk, and it is smooth and smooth. This is the whipped meringue

-
Pour one-third of the meringue into the egg yolk batter and mix with a silicone spatula (preheat the oven to 170 degrees)

-
Mix well and then pour back into the remaining meringue

-
Continue to stir with a silicone spatula until completely mixed. This is the cake batter. If you are not making a two-color cake, you can pour it into the mold and bake

-
Take about half of the cake batter and mix it with the cocoa batter that was mixed earlier

-
Cocoa will cause the egg whites to defoam, so don’t mix them for too long

-
Pour the mixed cocoa cake batter and original cake batter into the mold alternately

-
Pour all the cake batter into the mold and shake the mold twice to pop the big bubbles

-
Then put it into the oven and bake at 170 degrees for 35-40 minutes

-
Take the baked cake out of the oven immediately, shake the mold, and then invert it onto the wine bottle

-
After completely cooling, remove from the mold and gently press the edges of the cake inward with your hands. After one round of pressing, the cake will separate from the outside of the mold

-
Pick up the cake mold with a loose base, press the cake downwards, and separate the middle cylinder. Press upwards to separate the bottom. The force should not be too strong. You can also use a demoulding knife to remove the mold, but the cake taken off by hand is more beautiful
