Puzzle Cookies
Overview
Biscuits are a snack for everyone all year round. There are handmade biscuits with different characteristics. Some are simple in shape, so mothers can try the hands-on fun with their children; some are nutritious and suitable for snacks. It does not contain chemical leavening agents, so you can eat with peace of mind and health! Moreover, it is easy to store.
Tags
Ingredients
Steps
-
Prepare ingredients.

-
Melt the butter in water, add the powdered sugar, stir evenly, and then use a mixer (so that the powdered sugar will not fly out when stirring)

-
Stir until milky white.

-
Add the egg liquid in small amounts many times until it is slowly absorbed and beat well.

-
After the egg liquid is beaten, add the sifted flour and slowly stir up and down evenly.

-
Finally, knead it into a ball, cover it with a lid or plastic wrap, and let it rest for about 40 minutes.

-
Take a small piece of dough and place the template you want to make on it. (Special note: after rolling the dough into a round shape, it must be placed in the freezer for about 20 minutes. After that, the dough will shrink. Once it is a little harder, cut it again)

-
Use a knife to carve out the shape one by one. After each cut, tidy up the surroundings with your hands.

-
After carving out, place on the baking sheet, bake at 100 degrees for about 10 minutes, until the sides of the biscuits are slightly browned. (Every oven model is different, and the time is also different. Pay more attention when baking to avoid burning)

-
I used red yeast powder and added a little water, and then used a toothpick to write on it bit by bit. I used a brush to write on it, so the biscuit is not easy to absorb.

-
Here is another picture, the same method as above.

-
Take a small piece of dough and place the template you want to make on it. (Special note: after rolling the dough into a round shape, it must be placed in the freezer for about 20 minutes. After that, the dough will shrink. Once it is a little harder, cut it again)

-
After the shape is determined, use scissors to cut between each puzzle piece, and then carefully carve it out with a knife.

-
Place on a baking sheet, bake at 100 degrees for about 10 minutes, until the sides of the biscuits are slightly browned. (Every oven model is different, and the time is also different. Pay more attention when baking to avoid burning)

-
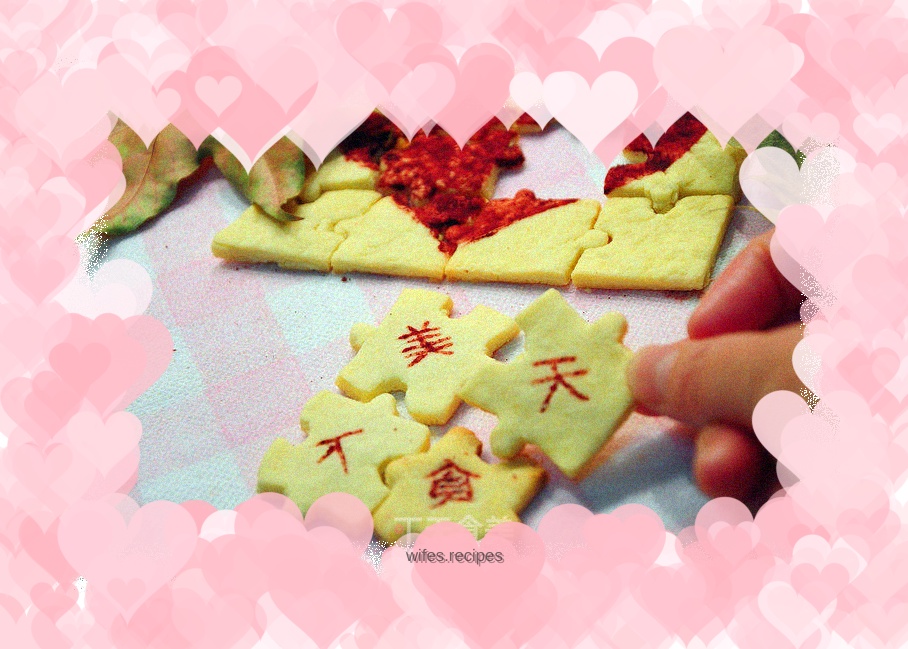
After each puzzle is completed, draw the pattern you like.

-
Okay. When you do it yourself, there are failures, but when you finish the product, all the failures are worth it.

-
The finished picture, the pattern I made is relatively simple, because I am not very good at art, so everyone can just take a look at it, thank you all.
