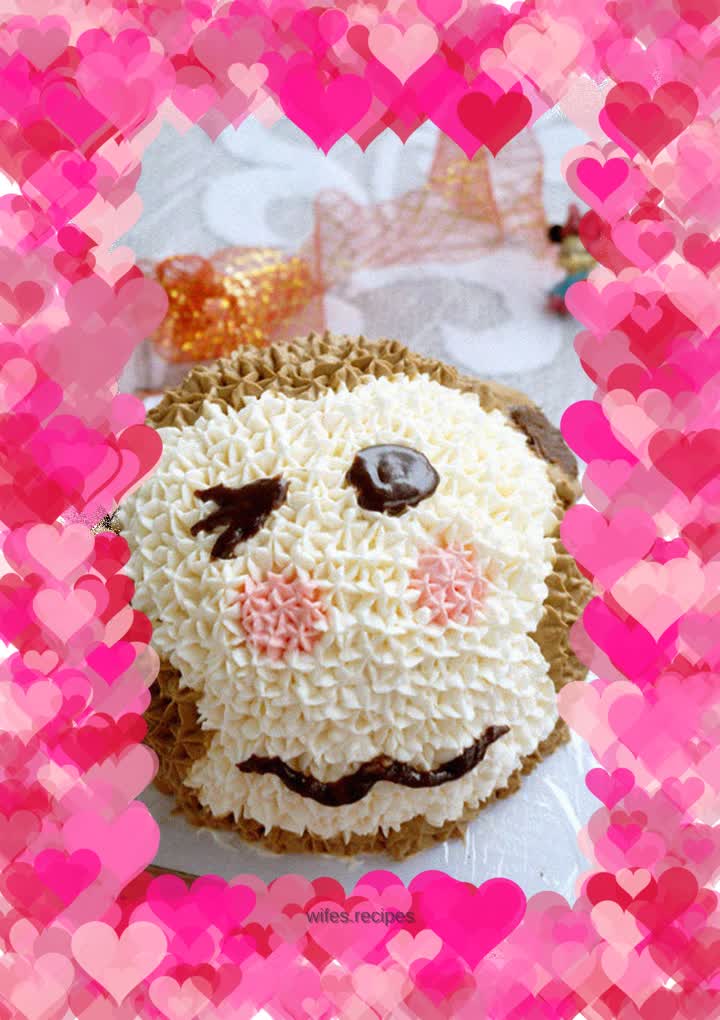
Decorated cake: little monkey
Overview
This little monkey kept it in his heart. After saving for a long time, he finally realized it. The cocoa chiffon base can be used to match the brown monkey hair of the little monkey. In order to match the flavor of the cocoa chiffon, some cocoa powder is added when beating the brown butter to give the butter a cocoa flavor. Maybe it would be better to use chocolate sauce or something, but I didn’t think of it at the time. The piping is very simple, but the face shape seems a little off, and the facial features don't seem to be straight enough, so I'll just make do with it. . . .
Tags
Ingredients
Steps
-
Ingredients: 1 6-inch cocoa chiffon cake, 350 grams of animal whipping cream, 35 grams of sugar, appropriate amount of cocoa powder, appropriate amount of chocolate sauce, and a little coloring

-
Cut the cake into three slices,

-
Bevel at 45 degrees and cut the top piece along the edge to create a bevel.

-
The cut edges of the cake are placed on the top surface to form the basis of the arc top.

-
Add the butter and sugar and whip until it maintains a texture.

-
Place a piece of cake on the decorating table and spread the filling cream on it.

-
Place the second slice of cake and spread the filling again.

-
Place the third slice, also covered with filling cream.

-
Wrap the sides of the cake around the top to create the fourth layer.

-
Fill the gap at the top of the arc with butter and begin to smooth the entire surface.

-
Finished.

-
Use a toothpick to outline the monkey face on the surface.

-
Mix the red cream and squeeze out two small red circles with a sharp-toothed nozzle to form red cheeks.

-
Use white cream and pipe a circle along the outline of the monkey's face.

-
Continue to fill in the entire face.

-
Mix cocoa powder and brown pigment into brown cream, and pipe it in a circle along the outside of the squeezed white face,

-
Then continue to fill in all the blank spaces,

-
Extrude an ear-shaped arc at the position of the ear.

-
Fill the space inside the pinna with chocolate sauce.

-
Spread chocolate sauce on top of the red cheek to make eyes.

-
Underneath the red cheeks, use chocolate sauce to outline the shape of the lips.

-
Done.
