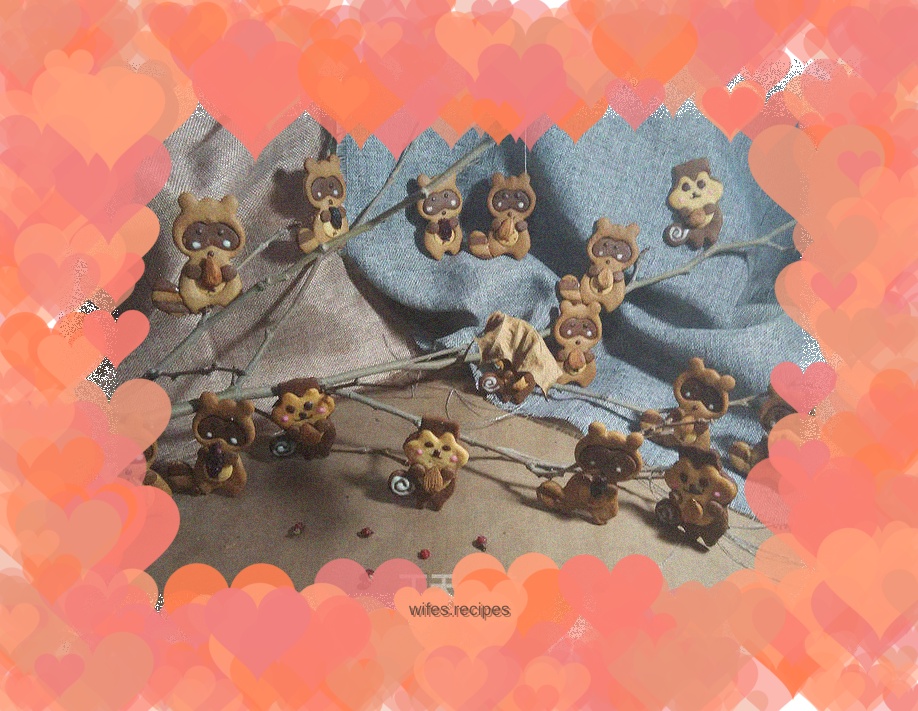
A bear biscuit that hugs nuts, and a little squirrel biscuit that can repay nuts
Overview
A biscuit that has been very popular on the Internet recently, the bear biscuit holding nuts, cute and adorable!
Tags
Ingredients
Steps
-
Group photo of ingredients

-
, after the butter is softened, add fine sugar and salt, and beat with a whisk until fluffy.

-
Add the eggs in two batches and continue to beat with a whisk,

-
Make the eggs and butter completely blend into a light and fluffy state

-
Sift the cake flour and baking powder into the butter.

-
Fold first with a rubber spatula to combine the flour and butter.

-
When the mixture is almost mixed, knead it into a soft dough with your hands. Divide the dough into two portions, use one portion for the squirrel cookies and half for the raccoon cookies.

-
To start with the squirrel cookies, divide the dough into two portions. Set aside one part, add 2 grams of cocoa powder to the other part, and knead for a while until the cocoa powder is completely integrated into the dough and it becomes a chocolate-flavored dough. In this way, we get one yellow original dough and one black chocolate dough

-
First, sandwich the black dough between two plastic bags (or two pieces of oil paper), and roll it out with a rolling pin into a dough sheet about 0.3CM thick (sandwiching it between plastic bags or oil paper can prevent the dough from being too sticky and difficult to roll out).

-
Peel off the upper plastic bag and use a squirrel shell mold to press out the shape.

-
Then use the little squirrel's face mold to print the shape of the squirrel's face on the original dough,

-
Also use the face mold to cut out the squirrel face in the black dough, and then as shown in the picture: Gently remove the squirrel face from the original dough and place it on the squirrel face in the black dough

-
Use the squirrel's little hand mold to press out the shape of a little hand on the black dough and place it on the biscuit. The picture above shows the shape of the biscuit with the little hand already placed on it.

-
Place the baking sheet into the middle rack of the preheated oven at 180°C and bake for 10-12 minutes, until the original dough turns light golden brown and is ready to serve

-
During the baking process, we only make raccoon biscuits. Divide the other dough into three parts of different sizes. Add 1 gram of cocoa powder to the large dough, and add all the remaining cocoa powder to the medium dough, so that the dough becomes as shown in the picture: small original dough, medium black dough, and large brown dough.

-
Use the small raccoon mold shell to print the shape of the small raccoon on the largest brown dough, gently remove it and place it on the baking sheet, then use the small raccoon eye and belly mold to press out the shape of the eyes and belly on it,

-
And take out the dough from the eyes and belly.

-
Then use the eye mold to press out the eye shape on the medium black dough

-
Use a belly mold to press out the belly shape on the plain dough

-
Put the black eyes into the brown shape

-
Put it on your belly as well

-
Roll the brown and black dough into a long strip, arrange the colors in staggered directions, and stick them with egg liquid

-
Use the tail mold to press out the shape of the tail on it

-
Glue the tail on with egg wash

-
Press out the shape of a small hand on the black dough,

-
Dip your hands with egg liquid, place the baking sheet into the middle of a preheated oven at 180°C, and bake for 10-12 minutes, until the original dough turns light golden brown and is ready to be baked

-
Once it's all out of the oven, you can melt some chocolate and draw eyes, nose, and navel

-
Unfortunately, my drawing skills are not good. A bunch of cute little animals turned out to be completely tragic once I added eyes to them! Hey! The eyes are the windows to the soul, this saying is absolutely true!

-
Especially these squirrels, I am completely speechless about my own painting skills

-
Okay, pick the dried fruit you like and let them hug it. Place your little hands just right so that the dried fruit can be stuck. That’s it. If it doesn’t stick, it doesn’t matter. Just put a little melted chocolate under the dried fruit and it will stick

-
In fact, this mold is a bit complicated, but the effect is better. It takes a lot of patience to pour the dough back and forth, so friends who are willing can try it. If you think this one is more troublesome, it doesn’t matter

-
Looking at this picture, I said I found it online and it was made by others. This one is also very fun. This one is much simpler. You can just use the original dough. Friends who love making cookies must have a bear cookie mold at home. Use the bear mold to make a bear shape on the dough. Add the eyes and nose. Then when the dough is soft, let the bear hug the dried fruit and bake it in the oven. The effect is still cute!
