Barbie Princess Cake
Overview
Every girl has a princess dream about Barbie, although I have been a tomboy since I was a child. She doesn't have long hair, doesn't have a dress, loves to jump around, is carefree, and doesn't look like a girl at all. Deep in the softest place in my heart, there lives a beautiful and kind-hearted little princess, who needs people to love her, needs people to warm her, and needs people to protect her... The first time I became a little princess, I encountered the days of Qiuhuhu. It didn’t work either with the air conditioner on or not. It was melting while doing it, and the lines were not clear. There were many shortcomings. However, when this imperfect Barbie product stood in front of me, my whole person changed for the better, and maternal love overflowed... My son also loved me so much. I said what I meant, and I protected her carefully, not wanting to eat the long-awaited cake. Who says little boys can't dream of being a princess? Who says little boys can't play with Barbie toys? This child is already obsessed with it.
Tags
Ingredients
Steps
-
Prepare the ingredients first (1). Sift the low-gluten flour

-
Separate the egg whites and yolks and put them into clean, water-free and oil-free containers. Add 3 drops of lemon juice into the egg whites

-
Add 25g powdered sugar to the egg yolks, beat with a manual egg beater, mix evenly, slowly add oil, stir evenly while adding

-
Add water in the same way, stirring evenly as you add.

-
Sift in the flour in 3 batches and mix gently

-
Mix into egg yolk paste without dry powder.

-
Add the remaining 1/3 of the icing sugar to the egg whites, beat with a mixer on medium speed until coarse foam, then change to high speed and add the remaining icing sugar in two batches.

-
Beat until almost dry, lift the whisk head and it will form a small right angle.

-
Take 1/3 of the meringue and add it to the egg yolk paste. Use the cutting and stirring technique to quickly mix evenly. Pour all the meringue into the remaining meringue and mix quickly in the same way. Pour into the skirt mold. Smooth the surface and gently shake out large bubbles.

-
Place in the middle and lower racks of the preheated oven, turn the heat up and down, 140 degrees, and bake for 50 minutes.

-
Take out the baked cake and drop it from a high place to release the heat.

-
Turn upside down on a cooling rack to cool

-
Use a stripping knife or bare hands to remove the film. Removing the film is easy. Sweep away the debris on the surface, and the Barbie skirt will be complete and smooth.

-
Start preparing the whipping cream. Put half of the whipping cream and powdered sugar in the ingredients (2) into a clean, water-free and oil-free cooking machine. (Considering that it is the first time and family members who don’t like dairy products, I whipped the whipping cream in two times.) Beat at low speed for about 1 minute,

-
Then beat at medium speed until ready for decorating. The mixing speed of the kitchen machine is very fast, so be sure to watch while beating to avoid overshooting.

-
Slice the cake into layers, wash the yellow peaches and kiwis, peel them and cut them into small pieces. Wrap the Barbie doll's body with tin foil or plastic wrap.

-
From bottom to top, from large to small, put a layer of cake slices, spread a thin layer of whipped cream, put a layer of fruit, spread a thin layer of whipped cream, put a layer of cake slices, repeat the operation, layer with yellow peach, layer with kiwi fruit, until the cake skirt is folded into

-
Insert the Barbie doll wrapped in tin foil from the small gap in the middle of the cake skirt

-
Whip the other half of the light cream in the same way, and add one toothpick red and one toothpick yellow food coloring. Mix well to make the light cream frost a light orange color, echoing the main color of golden autumn, haha. Put into prepared piping bag with cherry blossom piping tip and set aside.

-
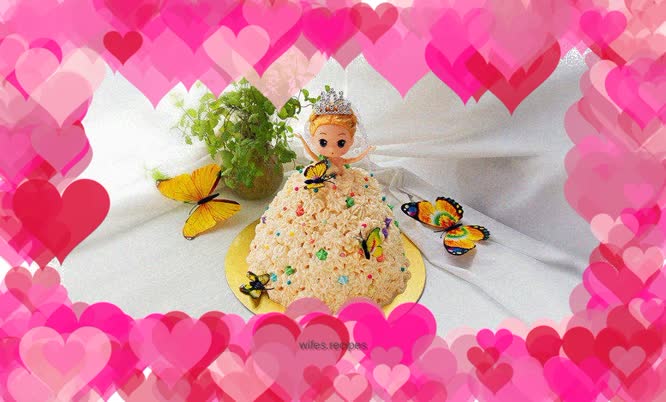
I am weak in making dough and decorating flowers. In addition, when it comes to whether it is cold or hot, it is not possible to turn on the air conditioner or not to turn on the air conditioner. So I directly put a thin layer of whipped cream on the surface of the skirt and squeezed it one by one to cover the entire skirt. The baby flew butterflies over again, and I finished the first Barbie in a hurry.
