Liangpier
Overview
I also experienced a failure. This is my little experience of successfully making cold skin. In the future, I can make it myself if I want to eat it. It is not difficult, not troublesome, clean, hygienic, and economical. I made cold skin yesterday, but it ended in failure as it was sticky, not chewy, everything fell apart. Not convinced, I looked for the reason. It can be said that what I made this time was really successful. It was not sticky, not broken, and had good chewiness. I will share the previous shortcomings for your reference: This time I prepared 3 small stainless steel basins, one to hold the batter, two small ones that take turns to blanche the cold noodles to save time, a large frying spoon with a lid, and a soup pot, which I used to put cold water in to cool the cold noodles. The spoon is a plastic spoon. My small basin is not too big, with a diameter of 26cm, one spoon at a time. First of all, the noodles made with cold skin for the first time were soft, and the dough was not kneaded vigorously, and the noodles were not risen. After the noodles were mixed, water was added to catch the noodles; secondly, when the noodles were washed with clean water, there was more water and the number of times was less. This time, more than half a small bowl of water was put in, and the number of times was more. I grabbed it ten times before the water was completely clear, and only the gluten was left. Also, the water separation time of the noodles left to settle is shorter. This time, the noodles were kneaded at night, caught, and allowed to settle overnight. The cold skin made by getting up early the next day should have settled time enough. Another key point is that when making the cold skin, just place the container directly on the boiling water in a large steamer. The skin will be peeled off without bubbling. There is no lid on the large frying spoon, and it does not take 3-5 minutes, which is only 1 minute. It seems to be undercooked, causing it to be sticky when cut, not to mention the texture. When the cold skin is mixed, it will fall into pieces. This time, I added a lid to the large frying spoon, and the dough had big bubbles inside, so it steamed for about 2 minutes with the lid on. Another point is to open the lid of the pot, take out the small basin containing the cold skin from the stir-fry, and sit the small basin on the cold water. After cooling, take out the small basin from the cold water pot. In the small basin, directly brush a small layer of oil on the front of the cold skin, and then peel off the cold skin to avoid stacking and sticking together. (The process of making cold skin is to brush the first small basin with oil and pour the batter, put it in a pot of boiling water, cover it, and then prepare the next small basin, brush oil and pour the dough paddle, and then the first time is almost done. Open the lid, the dough will swell and bubble, take out the small basin, and sit in a cold water soup pot to cool. At this time Just put the second basin into the boiling water pot, then cover it, and go back and take out the cooled dough basin. Don't rush to peel off the dough first. Brush a thin layer of oil on the dough first to prevent it from stacking up and sticking together. After brushing the oil, start peeling off the dough. Don't be afraid. It's very strong and won't break. Come down and put it on the plate, brush the uncovered basin with oil, add a spoonful of batter and prepare, then the one in the pot is ready, still the same method, uncover the pot, bubble, sit in cold water, immediately put the pot you just prepared into boiling water, and so on, until everything is done .) The above is my experience. I don’t know if I have made it clear. If you don’t understand, I will share it with you. I see that many colleagues who make cool skin have failed. I hope everyone can refer to this summary. I wish everyone success in making cool skin. Okay, I won’t say more, here is the picture, hahaha
Tags
Ingredients
Steps
-
I used a small and a half bowl of plain flour. Boil the soft and hard dumpling dough in warm water and let it rest for 30 minutes

-
Add half a small bowl of water each time to catch the noodles, and pour the water into another basin until there is no white left. I caught it 10 times and it was clear water.

-
This is the batter water after catching it. I caught it at 9pm and let it settle overnight. This is enough time for the batter and water to separate.

-
This is the smooth and strong gluten left after catching it. Then put it in the pot and steam it for 15 minutes. Turn the high heat to medium to low heat and steam it until it is cooked.

-
Let cool, cut into small cubes and serve on a plate for later use

-
This is the dough water that has settled overnight. Pour off the upper layer of water and leave the batter.

-
The remaining pure batter is mixed well and ready to make dough. Add enough water in a frying spoon to bring to a boil, and add cold water to a soup pot to cool.

-
Brush a thin layer of oil on the bottom of a small waterless basin, and add a spoonful of batter. My spoonful just covered the bottom of the basin. The amount of batter depends on the size of your basin

-
Place the basin on the boiling water in the pot, shake it quickly, wait until the batter solidifies slightly, and then cover the pot with a lid.

-
While closing the lid, brush another small basin with oil, pour the batter, shake well, and set aside. Use the two small basins alternately, saving time and no need to wait. At this time, the dough in the pot should be ready.

-
When you open the pot and see that the dough has puffed up, it means the dough is cooked. Take out the small basin and quickly put it into the cold water soup pot to cool down. At this time, put the other small basin you just prepared into the frying spoon, shake it evenly, and cover it when it solidifies slightly. Go back and take out the cooled small basin.

-
Don't rush to peel off the dough after cooling. At this time, the dough is fixed in the basin. Brush a thin layer of oil on the surface to prevent too much dough from sticking together.

-
After brushing with oil, peel off the cold skin. The cold skin is now strong. Don't worry, it won't break or stick. It's very strong.

-
Look, this is the next complete piece of dough, translucent, elastic and not broken.

-
Spread the peeled dough flatly on the plate, continue to brush the bottom of the empty basin with oil until the batter is reached, shake well, and set aside. At this time, the dough in the other basin in the wok should be ready. Open the lid and the dough will bulge. Now cool and brush with oil. In short, use the two small basins alternately. Don't forget to brush the empty basin with oil after removing the dough.

-
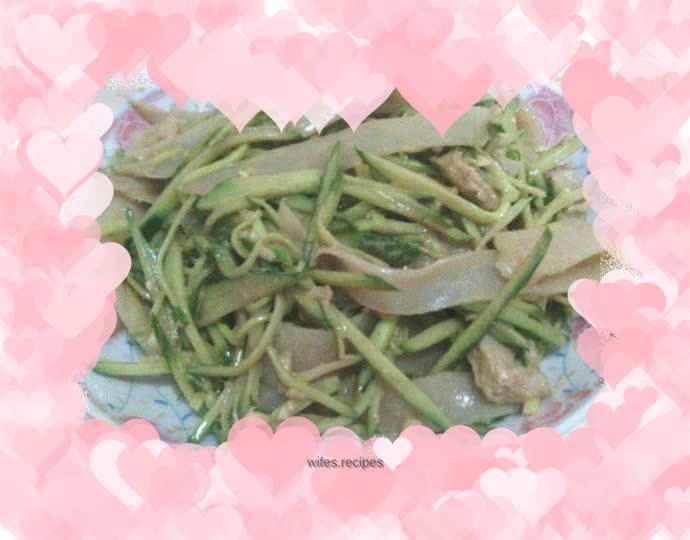
The time has come to test the success of the cold skin. When I cut it, the dough was strong and not broken, sticky or soft. I was secretly happy, hahaha, it was successful. I cut four pieces together and they were not broken at all. They did not stick. I put the cut dough, cucumber and Put the shredded garlic, minced garlic, and the diced gluten cut last night into a basin, add salt, light soy sauce, sesame paste, cumin seeds, white vinegar and mature vinegar, an appropriate amount, and add a little water, because I added the sesame paste directly, and my family did not add chili oil for fear of spiciness, and mix well.

-
Look! Fragrant! Delicious food is coming! The two of us can’t wait, hurry up and share the delicious food of success with us, let’s eat! oh~Yeah~
