Cocoa Cream Torte
Overview
The cocoa-flavored cake has a rich texture, and chocolate sauce is added to the whipped cream to make the cake even more mellow. Sprinkling some dried nuts and crushed cranberries on the surface not only improves the appearance of the cake, but also makes the taste more complex.
Tags
Ingredients
Steps
-
Cake ingredients are ready

-
Separate the egg white and egg yolk, and put the egg white into an oil-free and water-free egg beating basin

-
Beat the egg yolks with a hand whisk and pour in the corn oil

-
After mixing evenly, pour in the milk and continue mixing evenly

-
Sift 25 grams of cocoa powder into the egg yolk liquid

-
Mix well and sift in the flour

-
Mix the batter evenly in irregular directions until there is no dry powder

-
Beat the egg whites into rough foam with an electric whisk, then add 20 grams of sugar

-
When using medium speed to achieve a white and delicate state, add 30 grams of white sugar

-
When continuing to use medium speed to create obvious lines, add the remaining 30 grams of sugar

-
When you feel there is obvious resistance under your hands, lift the whisk and the beaten egg whites will form a large right angle. The cake will be moister and not dry. If you want the cake to rise better and have a puffier texture, you can continue beating for another minute or two. Lift the whisk and the egg whites will form a small right angle

-
Add one-third of the egg white batter into the cocoa batter and mix evenly

-
Pour the mixed batter back into the egg white batter basin

-
Continue to mix from upwards to form a fine and shiny cake batter

-
Pour the cake batter into an 8-inch square cake mold, smooth the surface, then pick up the mold and shake it downwards from a height of 20 centimeters to knock out any large air bubbles in the cake batter

-
Put the cake batter mold into the middle layer of the preheated oven, 130 degrees, heat up and down for 100 minutes; a reminder, this baking mold is made of non-stick material, so the chiffon cake cannot be baked at high temperature, otherwise it will rise very high, and the cake will shrink when it comes out, so it needs to be baked at a low temperature to prevent it from collapsing or shrinking after coming out of the oven

-
After taking it out of the oven, shake it downwards from a height of 20 centimeters a few times to knock out the excess heat inside the cake. Then place it upside down on a drying rack. After it cools, unmold it and cut it crosswise into two equal parts

-
Prepare the whipping cream, chocolate sauce and sugar that have been refrigerated for more than 10 hours

-
Pour an appropriate amount of whipped cream into a bowl, and then add an appropriate amount of chocolate sauce according to taste

-
When the cream is whipped with an electric mixer until it is thick, add 5 grams of cocoa powder and continue whipping until it is 80% thick but cannot flow easily

-
Take a piece of cake and use a spatula to spread an appropriate amount of cocoa cream on top of the cake piece, inside

-
Place another piece of cake on top, adjust the position, and use a knife to trim all sides

-
Put the cocoa butter into a piping bag and pipe out a grid on the surface of the cake

-
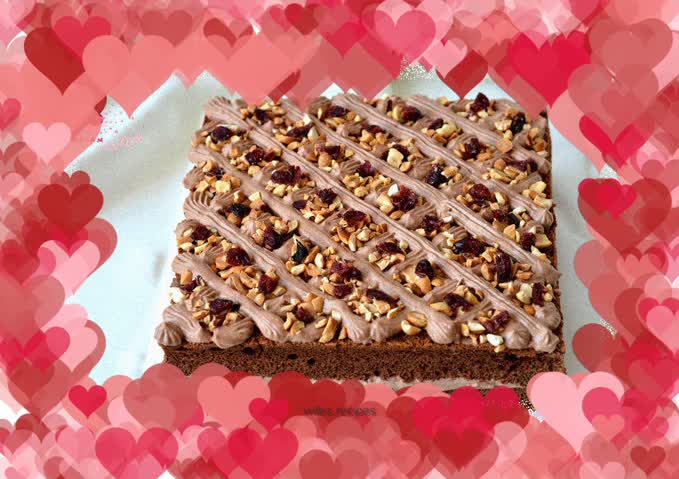
Just decorate the middle of the grid with chopped cashew nuts, chopped peanuts, and dried cranberries

-
Appreciation of the finished product

-
Appreciation of the finished product

-
Appreciation of the finished product

-
Appreciation of the finished product
