【Crispy Hydrangea Bun】
Overview
This plastic surgery was a look I learned a long time ago, and I didn’t do it again because of the trouble. However, this style has a nice name called hydrangea bag. It should be because the shape itself is round and round like a hydrangea~ At first, you may be a little confused when looking at the knitting method of this style, but in fact, as long as you follow the steps step by step, you will quickly become proficient. After doing one or two, you will be able to knit it very skillfully. However, because the number of small hydrangeas to be made for this amount is relatively large, it is very necessary to move faster~ Materials: Main dough: 180g high-gluten flour, 50g fine sugar, 3g yeast, 3g salt, 30g water, 47g egg liquid, 30g butter. Liquid: 100g high-gluten flour, 100g water, 1g yeast. Surface decoration: appropriate amount of egg liquid, appropriate amount of crispy chips, 8g wine-soaked cranberries. Crispy grains: 15g powdered sugar, 25g low-gluten flour, 12g milk powder, 20g butter
Tags
Ingredients
Steps
-
Put the liquid seed ingredients together into a small basin

-
Stir evenly, cover with plastic wrap and leave at room temperature for 1 hour, then place in the refrigerator to ferment for about 15 hours

-
Take out the fermented liquid ingredients, you can see that the batter has obviously expanded and there are many bubbles

-
When you peel off the batter, you can see that there are many honeycomb holes inside

-
Pour the main dough ingredients except butter into the mixing barrel, then pour the fermented liquid batter into it, fix the barrel and beat it into a ball

-
After the dough becomes chewy, add softened butter at room temperature

-
Continue beating until the dough can be pulled out into a smooth film

-
Shape the dough slightly and start basic fermentation

-
Let the dough ferment until about 2 times in size

-
Take it out and knead it evenly to release air

-
Divide the dough into 32 parts, each weighing about 24g

-
Roll into balls and let rest for 10 minutes

-
Take two pieces of relaxed dough and roll it into a long strip

-
Place them as shown in the picture, and don’t make any mistake in the order of top and bottom; at this time, you can number the dough in your mind, in order from left to right, one end of each dough is numbered from 1 to 4, and then number according to this rule again after each action; then do the actions according to the previous number: 3 press 4

-
Get the current state after the previous action, renumber it, and then continue the braiding action: 3 press 2

-
The current state is obtained after the previous action, and the action is executed after renumbering: 1 press 2

-
Then there is the state in the picture, and then it is repeated continuously: 3 press 4, 3 press 2, 1 press 2--3 press 4, 3 press 2, 1 press 2... It should be noted that after each action, all the dough must be re-numbered, from left to right it is still 1~4

-
Braid until the end and tighten the knot

-
Roll up from the tail

-
After rolling, pinch the edges tightly and place the seam side down

-
Arrange the shaped dough into the baking pan one by one

-
Put a bowl of hot water on the bottom layer of the oven, then place the baking sheet on the upper layer to start the secondary fermentation

-
You can make crispy chips during the fermentation period: put the required ingredients together and slowly knead them evenly with your hands

-
Also, chop the wine-soaked cranberries and set aside

-
After the second fermentation is completed, it will rise to about 1.5 times in size

-
Brush the surface evenly with a thin layer of egg wash

-
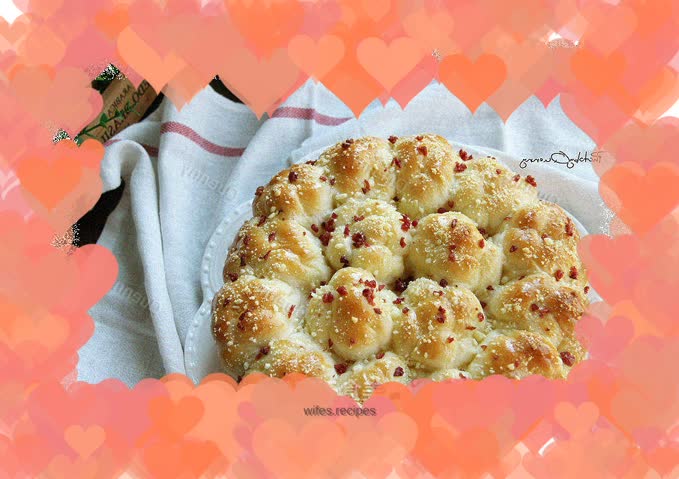
Sprinkle appropriate amount of crispy chips

-
Sprinkle with chopped cranberries

-
Place in the preheated oven at 180 degrees for about 25 minutes

-
Unmold immediately after taking out the oven, let cool and then seal and store
