Super cute little cute rabbit fondant cookies
Overview
Recently, I accidentally saw the making of fondant cake in a Youku video. I was attracted by the stunning appearance of the fondant cake and decided to give it a try. Of course, I had to start with simple fondant biscuits. I quickly bought the tools and ingredients needed to make fondant biscuits online. Since I have a baking background and I also like painting, the fondant biscuits I made for the first time - the kawaii little cute rabbit suddenly became a group of friends. As before, I packaged them in bags and shared them with my friends!
Tags
Ingredients
Steps
-
Melt the butter at room temperature into toothpaste, then use a whisk to beat the butter until it becomes white and slightly fluffy.

-
Pour the powdered sugar into the whipped butter and mix well.

-
Pour the egg mixture into the well-mixed butter and continue mixing evenly.

-
Pour the sifted low-gluten flour into the batter and mix evenly.

-
Put the mixed batter into a plastic bag, and knead it from the inside out to make a dough, so that the ingredients in the dough are fully integrated.

-
Place the kneaded dough in the refrigerator for about 20 minutes to make it easier to roll out. Take out the refrigerated dough and place it on a chopping board. Cover it with a layer of plastic wrap and use a rolling pin to roll the dough into a sheet about 5 mm thick.

-
Prepare the cookie molds needed to make cookies. I used a stainless steel rabbit mold.

-
Place the mold on the dough sheet and press out little bunny shapes.

-
Line a baking sheet with tin foil and arrange the bunny dough slices evenly on the baking sheet.

-
Place the baking sheet in the middle of the oven, select upper and lower heat, set the temperature to 160 degrees, and wait for 10-15 minutes until the surface of the biscuits turns slightly brown. (Each oven has different brands and functions, please choose the temperature and time yourself.) Let cool and set aside.

-
Here is an introduction to all the tools and ingredients needed for fondant.

-
Sprinkle powdered sugar on the silicone mat and evenly coat the rolling pin with powdered sugar to prevent sticking.

-
Use a knife to take out a few balls of dry Pest, and color them separately. Add the color depth according to your preference. I used Deborah brand dry Pest, white oil and pigment.

-
Roll out into dough and set aside.

-
Use fondant molds to press various shapes of sugar flowers on dough of different colors.

-
To make the flower more three-dimensional, press a few sugar beads in the middle. To prevent the finished sugar flowers from drying out, place them in a fresh-keeping box covered with tissue paper and seal them for storage.

-
After rolling the remaining pink dough into a long strip, use a rolling pin to help press it into bunny ears and set aside.

-
Take an appropriate amount of white dry Pez, add white oil and knead it. Set aside.

-
Roll out into thin dough.

-
Use a small rabbit stainless steel mold to press out the pattern on it.

-
Take out a piece of biscuit base, use a brush to evenly apply cold water on the back of the white dough sheet, cover it on a biscuit base of the same size, and press it gently with your hands for easy attachment.

-
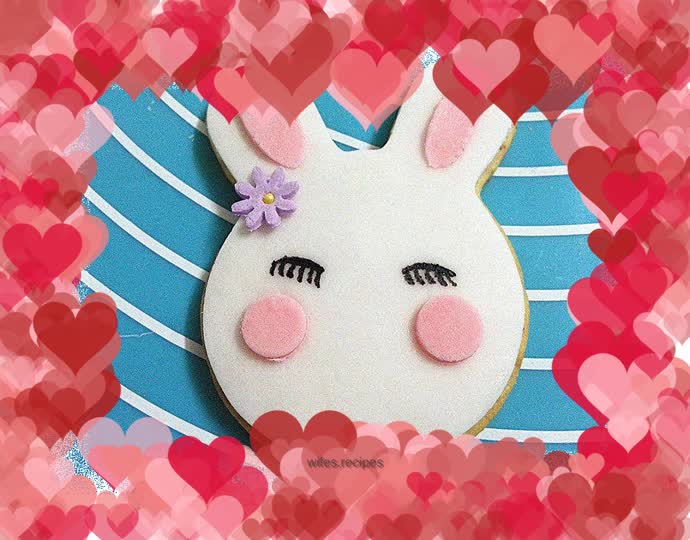
Use a brush dipped in water to attach the ears and red face in sequence. Pay attention to leaving a place for the eyes when attaching the red face.

-
Use a food pen to draw eyes.

-
Finally, decorate the ears with small flowers, and a super cute little bunny is ready! To prevent the fondant from drying out, place it quickly in a crisper or cookie bag.
